Monday, December 27, 2010

Spectrophotometry

Dalam kimia, spektrofotometri adalah pengukuran kuantitatif sifat refleksi atau transmisi material sebagai fungsi dari panjang gelombang [1] Hal ini lebih spesifik daripada spektroskopi elektromagnetik umum jangka yang berhubungan spektrofotometri dengan cahaya tampak, dekat-ultraviolet, dan. Dekat -inframerah, tetapi tidak meliputi teknik spektroskopi waktu diselesaikan.

Spektrofotometri melibatkan penggunaan spektrofotometer. spektrofotometer adalah fotometer (alat untuk mengukur intensitas cahaya) yang dapat mengukur intensitas sebagai fungsi dari panjang gelombang sumber cahaya. Penting fitur spektrofotometer adalah bandwidth spektral dan daerah linier pengukuran penyerapan.

Spektrofotometer yang paling sering digunakan untuk pengukuran transmitansi atau reflektansi dari bahan larutan atau transparan, seperti kaca dipoles. Namun mereka juga dapat dirancang untuk mengukur difusivitas pada salah satu rentang cahaya yang terdaftar yang biasanya mencakup sekitar 250nm -. 2500nm kontrol yang berbeda menggunakan dan kalibrasi [2] Dalam rentang ini cahaya, kalibrasi diperlukan pada mesin dengan menggunakan standar yang berbeda dalam tipe tergantung pada panjang gelombang penentuan fotometrik. [3]

Design

Monitor Color Calibration Techniques in Windows with Adobe Gamma

Each digital photo enthusiasts who print photos jepretannya results certainly have the experience when the composition of color prints with the printer turned out to differ with the composition of color images on the screen of his PC monitor. Create an amateur, it may not be significant problems. But for professionals such as photographers or layouter, this is an annoying problem. Why so?

Well, nothing is wrong. That's solely due to differences in ability between the monitor and printer in tonal reproduction. The ability of the printer in tonal reproduction / tone is much narrower than the monitor.

Technically, all the colors that can not be reproduced on the print medium is called out-of-gamut color. As an illustration, you can just create a fantastic color composition with Photoshop, Illustrator, or InDesign, but only a subset of these colors can be printed on paper.

To reduce the gap difference in the ability of the monitor and printer, need to do a technique called color monitor-printer calibration. With calibration, the monitor color reproduction capabilities will be a little "muted" and adjusted to a desktop printer color reproduction capabilities. Thus, the printout of a picture will not be too far different from what you see on your PC monitor screen.

The steps for calibrating the monitor are as follows:

Preparation:

If your CRT monitor, let him fire at least half an hour. This will provide sufficient heating time thus giving a more accurate reading of high color.

Adjust light / indoor lighting to a level where you will often work on the lighting level.

Double-click Adobe Gamma icon in Control Panel (if you do not find it, change the appearance of the Control Panel to Classic View then seen the display icon). Adobe Gamma window opens:

Adobe Gamma

If you want an easy way, select the Wizard and follow the instructions given. Done. However, this tutorial will discuss how a little challenging, so select Control Panel option if you like challenges, and then click Next.

Adobe Gamma Setting

See description area. If your monitor is listed there, select / select your monitor is.

Click the Load button beside it, then locate and open the monitor ICC profile that best suits your monitor. To view the full name of the ICC profile at the bottom of the Open Monitor Profile dialog box, select the file (File profiles in Windows have the. ICM. select one and click Open).

Adjusting brightness and contrast optimal:

While Adobe Gamma keep running, set the Contrast to maximum points. (Note: Contrast and Brightness settings monitor through the monitor settings button which is usually located at the bottom of your monitor)

Next you set the brightness while watching column Brightness and Contrast in Adobe Gamma. Set in such a way that the rows of gray boxes turn form the dark as possible, but not until the blend / color with the color of a row of black boxes that criss-cross with him. While the white box at the bottom should be kept to a white colored light. Dizziness is not it? See the picture below:

bar0

Bar

Bar1

Description:
A: The box is too light gray. Wrong.
B: The box is too dark gray and white boxes become gray. Wrong.
C: Box of gray and white tersetting perfectly. Right.

If from the beginning you do not see the color difference between the gray box with a black box, chances are the amount of phosphorus on the screen of your monitor has been reduced (fading). The best solution is to buy a new monitor:-D. Another possibility you could also suffer from partial color blindness. If so, represent the work of friends or relatives who berpengelihatan normal ...

Once you set the Contrast and Brightness, do not do it again unless you will update the monitor profile.

Choosing phosphorus data:

The content of phosphorus on the day after that your monitor determines the scope (range) of color you can see on the monitor.

Phospor Setting

Select the type of phosphor used in your monitor. Generally, the monitor uses the type of phosphor EBU / ITU or the Trinitron.

If your monitor is not the type of phosphorus contained in the list, but you've got data chromaticity coordinates of the monitor you have, select Custom, theninput the the data .

If you do not know, check the manual that came back on the monitor, contact the manufacturer representative / agent monitor, or if necessary use the color intensity measuring devices such as colorimeter and spectrophotometer. But I think few people are willing to Indonesia until much for troublesome ..

Midtones settings:

Deselect the option View Single Gamma Only.

Drag the slider below the box so that the color box in the middle of the blends (blends) with the background color (see picture):

midtones mula2

Become

Midtones2

Be careful in making adjustments midtones. Errors while doing this can cause additional colors (color cast) become invisible on a monitor (but can be seen on the printout)

Selecting a target gamma:

This option is not available on Windows NT, because the NT there is protection shields hardware that makes Adobe Gamma can not communicate with a computer video card. In Windows common (besides NT), set the target of Gamma on the value of 2:20

Setting the white point (white point) monitor:

White Point Setting

White point is the 'white-white', aka the limits of the monitor to display the color white as possible. White point measured by Kelvin color temperature.

If you know the exact white point of your monitor, select the drop-down menu available. If your monitor is new, set / set to 9300 K which is the default value of most PC monitors and televisions.

Save a monitor profile:

If you have finished setting, you must save the ICC profile that you created.

In the Adobe Gamma, rename the profile monitors posted on Description text box (for example, we give a new profile name "My Monitor"), and then click OK.

In the Save As dialog box, retype the name of the profile, and store in a folder color.

Done. The new color profiles will be used automatically by applications that support ICC-compliant color management, for example (Adobe) Photoshop, InDesign, and so forth.


Rotogravure

Rotogravure (roto or gravure for short) is a type of intaglio printing process, that is, it involves engraving the image onto an image carrier. In gravure printing, the image is engraved onto a copper cylinder because, like offset and flexography, it uses a rotary printing press. The vast majority of gravure presses print on rolls (also known as webs) of paper, rather than sheets of paper. (Sheetfed gravure is a small, specialty market.) Rotary gravure presses are the fastest and widest presses in operation, printing everything from narrow labels to 12 feet (4 m)-wide rolls of vinyl flooring. Additional operations may be in-line with a gravure press, such as saddle stitching facilities for magazine/brochure work. Once a staple of newspaper photo features, the rotogravure process is still used for commercial printing of magazines, postcards, and corrugated (cardboard) product packaging.
Diagram of rotogravure process

History and development

In the last quarter of the 19th century, the method of image photo transfer onto carbon tissue covered with light-sensitive gelatin was discovered, and was the beginning of rotogravure. In the 1930s–1960s, newspapers published relatively few photographs and instead many newspapers published separate rotogravure sections in their Sunday editions. These sections were devoted to photographs and identifying captions, not news stories. Irving Berlin's song Easter Parade specifically refers to these sections in the lines "the photographers will snap us, and you'll find that you're in the rotogravure." And the song Hooray for Hollywood contains the line "...armed with photos from local rotos" referring to young actresses hoping to make it in the movie industry.

In 1932 a George Gallup "Survey of Reader Interest in Various Sections of Sunday Newspapers to Determine the Relative Value of Rotogravure as an Advertising Medium" found that these special rotogravures were the most widely read sections of the paper and that advertisements there were three times more likely to be seen by readers than in any other section.

Process

Three methods of photoengraving have been used for engraving of gravure cylinders, where the cell open size or the depth of cells can be uniform or variable:

Method cell size cell depth
Conventional uniform variable
"Two positive" or "Lateral hard dot" variable variable
Direct transfer variable uniform

A rotogravure printing press has one printing unit for each color, typically CMYK or cyan, magenta, yellow and key (printing terminology for black). The number of units varies depending on what colors are required to produce the final image. There are five basic components in each color unit: an engraved cylinder (AKA "Gravure cylinder") (whose circumference can change according to the layout of the job), an ink fountain, a doctor blade, an impression roller, and a dryer. While the press is in operation, the engraved cylinder is partially immersed in the ink fountain, filling the recessed cells. As the cylinder rotates, it draws ink out of the fountain with it. Acting as a squeegee, the doctor blade scrapes the cylinder before it makes contact with the paper, removing ink from the non-printing (non-recessed) areas. Next, the paper gets sandwiched between the impression roller and the gravure cylinder. This is where the ink gets transferred from the recessed cells to the paper. The purpose of the impression roller is to apply force, pressing the paper onto the gravure cylinder, ensuring even and maximum coverage of the ink. Then the paper goes through a dryer because it must be completely dry before going through the next color unit and absorbing another coat of ink.

Because gravure is capable of transferring more ink to the paper than other printing processes, gravure is noted for its remarkable density range (light to shadow) and hence is a process of choice for fine art and photography reproduction, though not typically as clean an image as that of sheet fed litho or web offset litho. Gravure is widely used for long-run magazine printing in excess of 1 million copies. Gravure's major quality shortcoming is that all images, including type and "solids," are actually printed as dots, and the screen pattern of these dots is readily visible to the naked eye. Examples of gravure work in the United States are typically long-run magazines, mail order catalogs, consumer packaging, and Sunday newspaper ad inserts.

Rotogravure portrait of Charles Darwin, c. 1880

Other application area of gravure printing is in the flexible packaging sector. A wide range of substrates such as Polyethylene, Polypropylene, Polyester, BOPP, etc., can be printed in the gravure press.

Gravure is an industrial printing process mainly used for the high-speed production of large print magazines and runs at a constant and top quality, such as in the printing of large numbers of magazines and mail order catalogues. Other uses for the gravure process are in wallpaper and laminates for furniture where quality and consistency are desired.

Rotogravure presses for publication run at 45 feet (14 m) per second and more, with paper reel widths of over 10 feet (3 m), enabling an eight-unit press to print about seven million four-colour pages per hour. Gravure printing is a direct printing process that uses a type of image carrier called intaglio. Intaglio means the printing plate, in cylinder form, is recessed and consists of cell wells that are etched or engraved to differing depths and/or sizes. These cylinders are usually made of steel and plated with copper and a light-sensitive coating. After being machined to remove imperfections in the copper, most cylinders are now laser engraved. In the past, they were either engraved using a diamond stylus or chemically etched using ferric chloride which creates pollution. If the cylinder was chemically etched, a resist (in the form of a negative image) was transferred to the cylinder before etching. The resist protects the non-image areas of the cylinder from the etchant. After etching, the resist was stripped off. The operation is analogous to the manufacture of printed circuit boards. Following engraving, the cylinder is proofed and tested, reworked if necessary, and then chrome plated.

In direct image carriers such as gravure cylinders, the ink is applied directly to the cylinder and from the cylinder it is transferred to the substrate. Modern gravure presses have the cylinders rotate in an ink bath where each cell is flooded with ink. A system called a "doctor blade" rides against the cylinder to wipe away excess ink, leaving ink only in the cell wells. The doctor blade is normally positioned as close as possible to the nip point of the substrate meeting the cylinder. This is so that ink in the cells has less time to dry before meeting the substrate at the impression rollers. The capillary action of the substrate and the pressure from impression rollers draw/force the ink out of the cell cavity and transfer it to the substrate (Figure 1).

Gravure cylinders nowadays are typically engraved digitally by a diamond tipped or laser etching machine. On the gravure cylinder, the engraved image is composed of small recessed cells (or 'dots') that act as tiny wells. Their depth and size control the amount of ink that is transferred to the substrate (paper or other material, such as plastic or foil) via pressure, osmosis, and electrostatic pull. (A patented process called "Electrostatic Assist" is sometimes used to enhance ink transfer.)

Flexography

A flexographic printing plate.Flexography (often abbreviated to flexo) is a form of printing process which utilizes a flexible relief plate. It is basically an updated version of letterpress that can be used for printing on almost any type of substrate including plastic, metallic films, cellophane, and paper. It is widely used for printing on the non-porous substrates required for various types of food packaging (it is also well suited for printing large areas of solid color).

A flexographic printing plate.

History

In 1890, the first such patented press was built in Liverpool, England by Bibby, Baron and Sons. The water-based ink smeared easily, leading the device to be known as "Bibby's Folly". In the early 1900s, other European presses using rubber printing plates and aniline oil-based ink were developed. This led to the process being called "aniline printing". By the 1920s, most presses were made in Germany, where the process was called "gummidruck".

During the early part of the 20th century, the technique was used extensively in food packaging in the United States. However, in the 1940s, the Food and Drug Administration classified aniline dyes as unsuitable for food packaging. Printing sales plummeted. Individual firms tried using new names for the process, such as "Lustro Printing" and "Transglo Printing," but met with limited success. Even after the Food and Drug Administration approved the aniline process in 1949 using new, safe inks, sales continued to decline as some food manufacturers still refused to consider aniline printing. Worried about the image of the industry, packaging representatives decided the process needed to be renamed.

In 1951 Franklin Moss, then the president of the Mosstype Corporation, conducted a poll among the readers of his journal The Mosstyper to submit new names for the printing process. Over 200 names were submitted, and a subcommittee of the Packaging Institute's Printed Packaging Committee narrowed the selection to three possibilities: "permatone process", "rotopake process", and "flexographic process". Postal ballots from readers of The Mosstyper overwhelmingly chose the latter, and "flexographic process" was chosen.[1]

Evolution

Originally, flexographic printing was rudimentary in quality. Labels requiring high quality have generally been printed using the offset process until recently. Since 1990[2] great advances have been made to the quality of flexographic printing presses, printing plates and printing inks.

The greatest advances in flexographic printing have been in the area of photopolymer printing plates, including improvements to the plate material and the method of plate creation.

Digital direct to plate systems have been a good improvement in the industry recently. Companies like AV Flexologic, Dupont, MacDermid, Kodak and Esko have pioneered the latest technologies, with advances in fast washout and the latest screening technology.

Laser-etched ceramic anilox rolls also play a part in the improvement of print quality. Full color picture printing is now possible, and some of the finer presses available today, in combination with a skilled operator, allow quality that rivals the lithographic process. One ongoing improvement has been the increasing ability to reproduce highlight tonal values, thereby providing a workaround for the very high dot gain associated with flexographic printing.

Process overview

1. Platemaking[3]
The first method of plate development uses light-sensitive polymer. A film negative is placed over the plate, which is exposed to ultra-violet light. The polymer hardens where light passes through the film. The remaining polymer has the consistency of chewed gum. It is washed away in a tank of either water or solvent. Brushes scrub the plate to facilitate the "washout" process. The process can differ depending on whether solid sheets of photopolymer or liquid photopolymer are used, but the principle is still the same. The plate to be washed out is fixed in the orbital washout unit on a sticky base plate. The plate is washed out in a mixture of water and 1% dishwasher soap, at a temperature of approximately 40°C. The unit is equipped with a dual membrane filter. With this the environmental burdening is kept to an absolute minimum. The membrane unit separates photopolymer from the washout water. After addition of absorb gelatine for example, the photopolymer residue can be disposed of as standard solid waste together with household refuse. The recycled water is re-used without adding any detergent [4]. The second method used a computer-guided laser to etch the image onto the printing plate. Such a direct laser engraving process is called digital platemaking. Companies such as AV Flexologic, Polymount and Screen from The Netherlands are market leaders in manufacturing this type of equipment.

File:Aquasupreme2.gif

The third method is to go through a molding process. The first step is to create a metal plate out of the negative of our initial image through an exposition process (followed by an acid bath). This metal plate in relief is then used in the second step to create the mold that could be in bakelite board or even glass or plastic, through a first molding process. Once cooled, this master mold will press the rubber or plastic compound (under both controlled temperature and pressure) through a second molding process to create the printing plate.

2. Mounting
For every colour to be printed, a plate is made and eventually put on a cylinder which is placed in the printing press. To ensure an accurate picture is made, mounting marks are made on the flexographic plates. These mounting marks can be microdots (down to 0.3 mm) and/or mounting crosses. To make a complete picture, regardless of printing on flexible film or corrugated paper, the image transferred from each plate has to fit exactly in the images transferred from the other colors. Highly accurate and specific machinery is made for mounting these plates on the printing cylinders. One of the latest advances in this field is Fully Automatic Mounting Machine (FAMM), for which AV Flexologic won the FTA Technical Innovation Award in 2007.

File:Famm.gif

3. Printing
A flexographic print is made by creating a positive mirrored master of the required image as a 3D relief in a rubber or polymer material. Flexographic plates can be created with analog and digital platemaking processes. The image areas are raised above the non image areas on the rubber or polymer plate. The ink is transferred from the ink roll which is partially immersed in the ink tank. Then it transfers to the anilox roll (or meter roll) whose texture holds a specific amount of ink since it is covered with thousands of small wells or cups that enable it to meter ink to the printing plate in a uniform thickness evenly and quickly (the number of cells per linear inch can vary according to the type of print job and the quality required).[5] To avoid getting a final product with a smudgy or lumpy look, it must be ensured that the amount of ink on the printing plate is not excessive. This is achieved by using a scraper, called a doctor blade. The doctor blade removes excess ink from the anilox roller before inking the printing plate. The substrate is finally sandwiched between the plate and the impression cylinder to transfer the image.[6]

Flexographic printing inks

The nature and demands of the printing process and the application of the printed product determine the fundamental properties required of flexographic inks. Measuring the physical properties of inks and understanding how these are affected by the choice of ingredients is a large part of ink technology. Formulation of inks requires a detailed knowledge of the physical and chemical properties of the raw materials composing the inks, and how these ingredients affect or react with each other as well as with the environment. Flexographic printing inks are primarily formulated to remain compatible with the wide variety of substrates used in the process. Each formulation component individually fulfills a special function and the proportion and composition will vary according to the substrate.

There are five types of inks that can be used in flexography: Solvent-based Inks, Water-based Inks, EB (Electron Beam) curing inks, UV(ultraviolet) Curing Inks and two-part chemically-curing inks (usually based on polyurethane isocyanate reactions), although these are uncommon at the moment.[7] Water based flexo inks with particle sizes below 5 µm may cause problems when deinking recycled paper.

Ink control

The ink is controlled in the flexographic printing process by the inking unit. The inking unit can be either of Fountain Roll system or Doctor Blade System. The Fountain roll system is a simple old system yet if there is too much or too little ink this system would likely not control in a good way. The doctor blade inside the Anilox roller uses cell geometry and distribution. These blades insure that the cells are filled with enough ink.[2]

Applications

Flexo has an advantage over lithography in that it can use a wider range of inks, water based rather than oil based inks, and is good at printing on a variety of different materials like plastic, foil, acetate film, brown paper, and other materials used in packaging. Typical products printed using flexography include brown corrugated boxes, flexible packaging including retail and shopping bags, food and hygiene bags and sacks, milk and beverage cartons, flexible plastics, self adhesive labels, disposable cups and containers, envelopes and wallpaper. A number of newspapers now eschew the more common offset lithography process in favour of flexo. Flexographic inks, like those used in gravure and unlike those used in lithography, generally have a low viscosity. This enables faster drying and, as a result, faster production, which results in lower costs.

Printing press speeds of up to 600 meters per minute (2000 feet per minute) are achieveable now with modern technology high-end printers, like Flexotecnica [1], which introduced the world's first 12-color central impression (CI) drum press at Drupa 2008. This groundbreaking technology won the prestigious FlexoTech (UK) Innovation Award in 2008 [2]. Two 12-color presses have been installed in Europe.

History of color printing


Woodblock printing on textiles preceded printing on paper in both Asia and Europe, and the use of different blocks to produce patterns in color was common. The earliest way of adding color to items printed on paper was by hand-coloring , and this was widely used for printed images in both Europe and Asia. Chinese woodcuts have this from at least the 13th century, and European ones from very shortly after their introduction in the 15th century, where it continued to be practiced, sometimes at a very skilled level, until the 19th century - elements of the official British Ordnance Survey maps were hand-colored by boys until 1875. Early European printed books often left spaces for initials, rubrics and other elements to be added by hand, just as they had been in manuscripts, and a few early printed books had elaborate borders and miniatures

added. However this became much rarer after about 1500.

Europe

Most early methods of color printing involved several prints, one for each color, although there were various ways of printing two colors together if they were separate. Liturgical and many other kinds of books required rubrics, normally printed in red; these were long done by a separate print run with a red forme for each page. Other methods were used for single leaf prints. The chiaroscuro woodcut was a European method developed in the early 16th century, where to a normal woodcut block with a linear image (the "line block"), one or more colored "tone blocks" printed in different colors would be added. This was the method developed in Germany; in Italy only tone blocks were often used, to create an effect more like a wash drawing. Jacob Christoph Le Blon developed a method using three intaglio plates, usually in mezzotint; these were overprinted to achieve a wide range of colors.

Asia

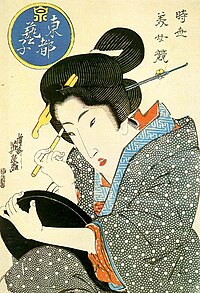
Bijin (beautiful woman) ukiyo-e by Keisai Eisen, before 1848

In Europe and Japan, color woodcuts were normally only used for prints rather than book illustrations. In Chinese woodblock printing, where the individual print did not develop until the nineteenth century, the reverse is true, and early color woodcuts mostly occur in luxury books about art, especially the more prestigious medium of painting. The first known example is a book on ink-cakes printed in 1606, and color technique reached its height in books on painting published in the seventeenth century. Notable examples are the Treatise on the Paintings and Writings of the Ten Bamboo Studio of 1633, and the Mustard Seed Garden Painting Manual published in 1679 and 1701.[1]

In Japan color technique, called nishiki-e in its fully developed form, spread more widely, and was used for prints, from the 1760s on. Text was nearly always monochrome, as were images in books, but the growth of the popularity of ukiyo-e brought with it demand for ever increasing numbers of colors and complexity of techniques. By the nineteenth century most artists worked in color. The stages of this development were:

  • Sumizuri-e (墨摺り絵, "ink printed pictures") - monochrome printing using only black ink
  • Benizuri-e (紅摺り絵, "crimson printed pictures") - red ink details or highlights added by hand after the printing process;green was sometimes used as well
  • Tan-e (丹絵) - orange highlights using a red pigment called tan
  • Aizuri-e (藍摺り絵, "indigo printed pictures"), Murasaki-e (紫絵, "purple pictures"), and other styles in which a single color would be used in addition to, or instead of, black ink
  • Urushi-e (漆絵) - a method in which glue was used to thicken the ink, emboldening the image; gold, mica and other substances were often used to enhance the image further. Urushi-e can also refer to paintings using lacquer instead of paint; lacquer was very rarely if ever used on prints.
  • Nishiki-e (錦絵, "brocade pictures") - a method in which multiple blocks were used for separate portions of the image, allowing a number of colors to be utilized to achieve incredibly complex and detailed images; a separate block would be carved to apply only to the portion of the image designated for a single color. Registration marks called kentō (見当) were used to ensure correspondence between the application of each block.

19th century

Children's book illustration by Randolph Caldecott; engraving and printing by Edmund Evans, 1887

In the 19th century a number of different methods of color printing, using woodcut (technically Chromoxylography) and other methods, were developed in Europe, which for the first time achieved widespread commercial success, so that by the later decades the average home might contain many examples, both hanging as prints and as book illustrations. George Baxter patented in 1835 a method using an intaglio line plate (or occasionally a lithograph), printed in black or a dark color, and then overprinted with up to twenty different colors from woodblocks. Edmund Evans used relief and wood throughout, with up to eleven different colors, and latterly specialized in illustrations for children's books, using fewer blocks but overprinting non-solid areas of color to achieve blended colors. Artists such as Randolph Caldecott, Walter Crane and Kate Greenaway were able to draw influence from the Japanese prints now available and fashionable in Europe to create a suitable style, with flat areas of color.

Chromolithography was another process, which by the end of the 19th century had become dominant, although this still used multiple prints with a stone for each color. Mechanical color separation, initially using photographs of the image taken with three different color filters, reduced the number of prints needed to three. Zincography, with zinc plates, later replaced lithographic stones, and remained the commonest method of color printing until the 1930s.

Modern process

Color separation process

The process of color separation starts by separating the original artwork into red, green, and blue components (for example by a digital scanner). Before digital imaging was developed, the traditional method of doing this was to photograph the image three times, using a filter for each color. However this is achieved, the desired result is three grayscale images, which represent the red, green, and blue (RGB) components of the original image:

The next step is to invert each of these separations. When a negative image of the red component is produced, the resulting image represents the cyan component of the image. Likewise, negatives are produced of the green and blue components to produce magenta and yellow separations, respectively. This is done because cyan, magenta, and yellow are subtractive primaries which each represent two of the three additive primaries (RGB) after one additive primary has been subtracted from white light.

Cyan, magenta, and yellow are the three basic colors used for color reproduction. When these three colors are variously used in printing the result should be a reasonable reproduction of the original, but in practice this is not the case. Due to limitations in the inks, the darker colors are dirty and muddied. To resolve this, a black separation is also created, which improves the shadow and contrast of the image. Numerous techniques exist to derive this black separation from the original image; these include grey component replacement, under color removal, and under color addition. This printing technique is referred to as CMYK (the "K" being short for "key." In this case, the key color is black).

Today's digital printing methods do not have the restriction of a single color space that traditional CMYK processes do. Many presses can print from files that were ripped with images using either RGB or CMYK modes. The color reproduction abilities of a particular color space can vary; the process of obtaining accurate colors within a color model is called color matching.

Screening

Inks used in color printing presses are semi-transparent and can be printed on top of each other to produce different hues. For example, green results from printing yellow and cyan inks on top of each other. However, a printing press cannot vary the amount of ink applied to particular picture areas except through "screening," a process that represents lighter shades as tiny dots, rather than solid areas, of ink. This is analogous to mixing white paint into a color to lighten it, except the white is the paper itself. In process color printing, the screened image, or halftone for each ink color is printed in succession. The screen grids are set at different angles, and the dots therefore create tiny rosettes, which, through a kind of optical illusion, appear to form a continuous-tone image. You can view the halftoning, which enables printed images, by examining a printed picture under magnification.


Traditionally, halftone screens were generated by inked lines on two sheets of glass that were cemented together at right angles. Each of the color separation films were then exposed through these screens. The resulting high-contrast image, once processed, had dots of varying diameter depending on the amount of exposure that area received, which was modulated by the grayscale separation film image.

The glass screens were made obsolete by high-contrast films where the halftone dots were exposed with the separation film. This in turn was replaced by a process where the halftones are electronically generated directly on the film with a laser. Most recently, computer to plate (CTP) technology has allowed printers to bypass the film portion of the process entirely. CTP images the dots directly on the printing plate with a laser, saving money, increasing quality (by reducing the repeated generations), reducing lead-times, and saving the environment from toxic film-processing chemicals.

Screens with a "frequency" of 60 to 120 lines per inch (lpi) reproduce color photographs in newspapers. The coarser the screen (lower frequency), the lower the quality of the printed image. Highly absorbent newsprint requires a lower screen frequency than less-absorbent coated paper stock used in magazines and books, where screen frequencies of 133 to 200 lpi and higher are used.

The measure of how much an ink dot spreads and becomes larger on paper is called dot gain. This phenomenon must be accounted for in photographic or digital preparation of screened images. Dot gain is higher on more absorbent, uncoated paper stock such as newsprint.